Articulation gymnastics for whistling sounds
1. Lip exercises.
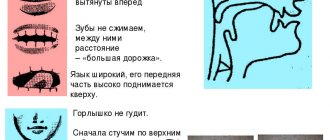
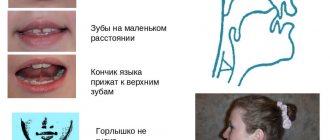
- “Smile” - stretch your lips into a smile as much as possible. The teeth should be closed. Hold your lips in this position for several seconds. Repeat several times.
- “Tube” - the teeth are closed, the lips are pulled forward.
2. An exercise to develop an air stream - be able to forcefully blow air through your lips, folded into a tube. The air stream should be sharp and cold. Repeat several times.
- “Football” - you need to take a small piece of cotton wool. This will be the ball. Set up an improvised gate. The child must blow forcefully on the cotton wool and try to score a goal. Monitor the direction of the air stream. She should be strong, cold, lips like a tube.
3. Exercises for the tongue.
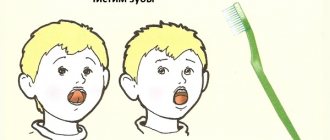
- “Let’s brush your lower teeth” - smile, open your mouth slightly, use the tip of your tongue to “brush” your lower teeth from the inside, moving your tongue from side to side.
Speech therapy exercises for vowel sounds
Speech therapy exercise for pronouncing the sound “A” 1) Articulation gymnastics
Extend the sound “A” for a long time, rocking the doll in your arms (mouth wide open).
2) Fingers say hello
Each finger of the right hand, starting with the index, touches the thumb of the same hand in turn. At this time, we pronounce the sound “A” with each contact. An adult can help the baby if he himself cannot connect his fingers correctly.
3) Repeat onomatopoeia
Af – af (dog). Kwa – kwa (frog).
4) Ladushki
We play “Ladushki”, pronouncing the sound “A” loudly and clearly:
Oh, okay, okay, they baked pancakes, put them on the window (turn your hands palms up), forced them to cool (blow on your palms).
Speech therapy exercise for pronouncing the sound “U”
1) Articulation gymnastics
Exercise Tube. We make the sound “U” for a long time, while stretching out our lips like a tube.
2) Onomatopoeia
Mu - mu (cow), do - do (pipe), ua - ua (the baby is crying), ku - ka - re - ku (the cockerel is singing).
3) Fingers say hello
Each finger of the right hand, starting with the index, touches the thumb of the same hand in turn. At this time, we pronounce the sound “U” with each contact. An adult can help the baby if he himself cannot connect his fingers correctly.
4) Train game
Learn and repeat the following nursery rhyme with your child:
| The locomotive is going, going - TU - TU - U - U! He drove the trailers - TU - TU - U - U! |
5)Game "Echo"
The game is as follows. First say “AU” loudly with your child, then repeat “AU” quietly.
Speech therapy exercise for pronouncing the sound “I”
1) Articulation gymnastics
We hold out the sound “I” for a long time (while keeping our lips in a smile).
2) Fingers say hello
Each finger of the right hand, starting with the index, touches the thumb of the same hand in turn. At this time, we pronounce the sound “I” with each contact. An adult can help the baby if he himself cannot connect his fingers correctly.
3) Onomatopoeia
and - and - and - go - go (horse), pi - pi (mouse).
4) Play the following game with your child. Give your child a steering wheel for this and teach him the following nursery rhyme:
Game "Chauffeur"
| In the car, the driver is sitting in the car. The car, the car is moving, buzzing: “BI - BI”! |
Speech therapy exercise for pronouncing the sound “O”
1) Articulation gymnastics
Ask your child to round his mouth and extend his lips slightly forward. Extend the sound “O” for a long time.
2) A game
Play the following game with your child: “Oli’s doll has a toothache.”
In this game you need to put your palms to your cheeks, shake your head and chant: “Oh - Oh - Oh!” Try to have your child repeat all the tasks after you.
3) Fingers say hello
Each finger of the right hand, starting with the index, touches the thumb of the same hand in turn. At this time, we pronounce the sound “O” with each contact. An adult can help the baby if he himself cannot connect his fingers correctly.
4) Onomatopoeia
ko - ko (chicken), but - but (ridden on a horse).
5) cat house
Learn and repeat the following nursery rhyme with your child:
| Bom - bom, bom - bom! The cat's house caught fire. A chicken runs with a bucket and floods the cat's house. |
Speech therapy exercise for pronouncing the sound “E”
1) Articulation gymnastics
Ask your child to round his lips into an oval and extend his lips slightly forward. We hold out the sound “E” for a long time.
2) A game
Play the following game with your child. Together with him you need to first depict large bears. To do this, emit the sound “E – E – E!” in a low voice for a long time. Then repeat, also in a high voice, “uh-uh-uh!”, imitating little bears.
3) Fingers say hello
Each finger of the right hand, starting with the index, touches the thumb of the same hand in turn. At this time, we pronounce the sound “E” with each contact. An adult can help the baby if he himself cannot connect his fingers correctly.
4) This is my family
Playing with fingers. Bend your fingers on the child’s palm, while repeating a funny nursery rhyme:
| Bend the thumb Bend the index finger Bend the middle finger Bend the ring finger Bend the little finger Fold a fist | - This finger is grandfather, - This finger is grandma, - This finger is daddy, - This finger is mommy, - This finger is me, - This is my family! |
Speech therapy exercise for pronouncing the sound “Y”
1) Articulation gymnastics
The wolf growls. Portray an angry wolf with your child. Clench your fists and frown. Ask your child to also clench his teeth in a grin. Extend the sound “Y” for a long time.
2) Fingers say hello
Each finger of the right hand, starting with the index, touches the thumb of the same hand in turn. At this time, we pronounce the sound “Y” with each contact. An adult can help the baby if he himself cannot connect his fingers correctly.
3) Wash your hands
Play this simple game with your child. To do this, you just need to wash your hands while repeating a funny nursery rhyme:
| They washed, washed their hands with soap, washed with warm water. Washed, washed, washed, washed - White - washed white! |
4) A game
The goal of the next game is to teach the child to distinguish the unvoiced sound “Y” from the voiced “I”. Place two pictures in front of the child: with a bear and a mouse. The child must show you where the mouse is and where the bear is.
Speech exercises to reinforce the pronunciation of the sound “C”
Pronouncing the hard sound “S” in straight syllables
1. Pronounce or read the syllables, extending the “s” sound:
- “sa-sa-sa”; “sy-sy-sy-sy”; “su-su-su-su”; “so-so-so-so.”
- “sa-sy-so-su”; “sy-so-su-sa”; “so-su-sa-sy”; “su-sa-sy-so.”
2. Game “Memorize and repeat”:
- “sa-sa-so”; "so-sa-so"; "so-sa-ea"; “sy-sa-sy”; “sa-sy-sy”; “sa-sy-sa”; “sa-sa-sy”; “sy-so-su”; “su-ey-su.”
3. Repeat the nursery rhyme and remember it:
- Sa-sa-sa - here comes the fox.
- So-so-so - she rolls the wheel.
- Sy-sy-sy - a fox has a red tail.
- Su-su-su - we are not afraid of the fox.
Pronouncing syllables
- “So”: juice, catfish, sleep, Sonya, soda, falcon, litter, hill, barefoot, oblique, sand, sock, forest, belt, spikelet, wheel, bean, tall, sedge.
- “Sa”: himself, garden, lard, sleigh, Sasha, sugar, cod, sleigh, wasp, fox, braid, dew, bite, write, beauty, sausage, stripe, sambo, landing, mustachioed, kindergarten, write.
- “Su”: soup, bough, court, bag, vessel, dishes, carry, draw, carry, vessel.
- “Sy”: cheese, son, owl, full, scales, mustache, noses, scarf, parcel, rash, mound.
Pronunciation of words
1.With unstressed syllables:
- Salad, gardens, boot, fireworks, cash register, mass, plane, sundress, Larisa, rat, be able to, chest, souvenir, cheese, son, raw, wasps, beads, rails, hair, blond, send.
At this stage, it is recommended to use visual material, card indexes of subject pictures, and playful work techniques.
2. Pronounce the syllables correctly:
- “ska-sko-sku-sky”; “sla-slo-slu-sly”; “sma-smo-smo-smy”;
- “swa-swo-swo-swa”; “spa-spo-spo-spa”; “hundred-hundred-stu-sty.”
3. Read or say “difficult” words - with a combination of consonants:
- Pile, dump, dump, your, firmament; rolling pin, roll down, tablecloth, bench, fast, Glory, sweet, elephant, word, hearing; could, we can, wash away, dare, sheaf, again, dreams; sleep, dispute, sport, satellite, confuse, camp, steel, put, put, old man, glass, get, stand up; one hundred, table, so much, stand; tincture; chair, knock, steps, offense, deed.
What is articulation gymnastics?
This is gymnastics for the organs of articulation (lips, tongue, jaws). If a child’s pronunciation of sounds is impaired, this indicates that his speech apparatus muscles are not sufficiently developed. The goal of articulatory gymnastics is to develop clear movements necessary for pronouncing various groups of sounds. Systematic performance of articulatory gymnastics promotes proper muscle development and prepares the child to produce sounds, but cannot replace the work of a speech therapist.
Articulation gymnastics is needed not only for children with impaired sound pronunciation, but also for everyone else. Correct articulation will make any child's speech clear, clear and correct.
You can perform the exercises at any free time, but it is better if the child is not very excited, since he will have to spend time quietly, sitting in front of the mirror, for 10-15 minutes.
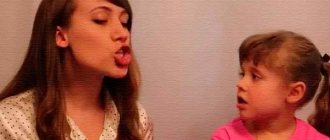
At the initial stage, it is recommended to do articulatory gymnastics in front of a large mirror, in which the child can see both himself and the adult. If you don’t have such a mirror, then a small table mirror will be suitable for your baby. In it, the child will see his organs of articulation, and an adult will sit opposite the child and be able to show him a sample of how to perform the exercises. The role of parents in performing the exercises is to demonstrate correctly, as well as to control the clear and correct execution of the exercises by the child. Attention should be paid to how well the child performs the exercise, monitor the quality and volume of movements of the articulation organs, their strength, and accuracy of movements. It is necessary to improve the ability to hold organs in the desired position.
Each exercise is repeated from 3 to 5-6 times. The complex does not need to include more than 10 exercises.
Types of articulation exercises
All articulatory gymnastics exercises are divided into 2 types: static and dynamic.
In static exercises you need to hold a certain position motionless. Such exercises include “Spatula” (“Pancake”), “Needle”, “Cup”, “Mushroom”, “Pipe” (“Pipe”), “Fence”, “Trunk” and others.
In dynamic exercises, you don’t just need to hold a position, but perform certain movements. In them, it is important to monitor the precise execution of movements and the position of the articulatory organs. For example: in the “Brushing your teeth” exercise, your lips should be stretched to the sides so that your teeth are exposed. Only the tip of the tongue should move during the exercise. The jaw and lips should remain motionless.
But before starting to perform articulatory gymnastics, it would be a good idea for parents to consolidate with their child knowledge about orientation in space: top - bottom, right - left, forward - back. All these concepts will constantly sound as instructions for the correct execution of exercises.
Once you start doing articulation gymnastics with your child, you will see how difficult it is for him to perform certain exercises. The baby may have increased salivation, trembling of the tip of the tongue, difficulty holding the organ in a certain position, and much more. During this period, it is better not to concentrate the baby’s attention on his shortcomings. You need to constantly praise your child for his diligence and desire to do the exercise correctly.
Over time, the tension in the organs will begin to disappear, and its movements will become more precise and coordinated. Then it’s time to start alternating static exercises (i.e. those when the position of an organ is fixed for a certain time). It is good to alternate exercises “Fence” and “Tube”, “Proboscis” and “Smile”, “Shovel” and “Needle”.
When working with a child, you should always remember that by showing your imagination, you can make any activity for your child an exciting game and turn it into a fairy tale to which the child will return again and again. The presentations we present on this page are designed to create a positive emotional mood in the child while performing articulatory gymnastics .
Description of articulation exercises
Description of basic articulation exercises
1. "Window". When you hear the word “Hot,” open your mouth wide. All teeth are visible. The tongue lies quietly behind the lower teeth. Keep counting from 1 to 5. When you say “Cold,” close your mouth (first teeth, then lips). 2. “Frog” or “Smile”. Stretch your lips into a smile. Show upper teeth. The lower teeth should not be visible. Hold the count from 1 to 5. 3. “Proboscis.” Close your teeth, lips tightly closed, extend with your proboscis. Hold the count from 1 to 5. 4. “Fence.” Raise your upper lip, lower your lower lip. Show closed teeth. Hold the count from 1 to 5. 5. “Bagel” or “Tube”. Pull your rounded lips forward slightly. The teeth are closed. Hold for a count from 1 to 5. 6. “Shovel” or “Pancake.” Relax your wide tongue and place it on your lower lip. Make sure your tongue doesn't tremble. Hold the count from 1 to 5. 7. “Needle.” Open your mouth wide. All teeth are visible. Stick your tense tongue far forward, make it narrow. Hold the count from 1 to 5. 8. “Brush your teeth.” The mouth is slightly open, all teeth are visible. Use your tongue to clean the lower and upper teeth from the inside (movements left and right). The lower jaw is motionless. Perform by counting from 1 to 5. 9. “Swing”. Stick out your narrow tongue. Use the tip of your tongue to reach alternately towards your nose and then towards your chin. Don't close your mouth. The lower lip does not stretch over the lower teeth. The lower jaw is motionless. Perform by counting from 1 to 5. 10. “Delicious jam.” Imagine that your upper lip is smeared with jam. Open your mouth slightly and use the wide tip of your tongue to lick your lip from top to bottom (but not in a circle). The lower jaw is motionless. Repeat 5 times. 11. "Steps". Open your mouth wide. All teeth are visible. The tongue “jumps” onto the first step - the upper lip (the tip of the tongue should be wide), then onto the upper teeth and behind the upper teeth. The lower jaw is motionless. Repeat 5 times. 12. "Cup". Open your mouth wide. Raise the wide tongue upward. Reach towards your upper teeth, but do not touch them. The lower lip should not be pulled over the teeth. Hold for a count from 1 to 5. 13. “Turkey Poults.” Open your mouth slightly. The lower lip does not stretch over the teeth. Using the wide tip of your tongue, lick your upper lip from top to bottom, adding a voice. The lower jaw is motionless. 14. "Painter". Open your mouth wide. All teeth are visible. Use the wide tip of your tongue to stroke the upper palate back and forth. The lower jaw is motionless. 15. "Woodpecker". Open your mouth wide. Use the wide tip of your tongue to hit the upper teeth from the inside (English D). The lower jaw is motionless. 16. "Horse". Open your mouth wide. Suck the back of your tongue to the roof of your mouth and tear it off (click your tongue). All teeth are visible. The lower jaw is motionless. 17. "Fungus". Open your mouth. Suck your tongue to the roof of your mouth. The tongue looks like a mushroom: the hyoid frenulum is the leg, the back of the tongue is the cap. 18. "Accordion". Open your mouth wide. All teeth are visible. Suck your tongue to the roof of your mouth (“fungus”). Close and open your teeth without lifting your tongue from the roof of your mouth. Lips in a smile. 19. "Reel".
The tip of the tongue “clings” to the lower incisors. Push the rest of the tongue forward and bite on top with your teeth. The tongue is rough like a spool of thread.
20. "Gorka"
The exercise is performed as a “Coil”, only the tip of the tongue is behind the upper incisors. You can see the inside of the tongue is slippery, like a slide.
A set of exercises for the posterior lingual sounds K, Kj; G, Gy; X, Xx; Y
1. “Kneading the dough” • Smile, open your mouth slightly and bite your tongue. 2. “Punish a naughty tongue” • Smile, open your mouth slightly, put the wide front edge of your tongue on your lower lip and “slap” it with your lips, saying “five-five-five.” (Alternate exercises No. 1 and No. 2) 3. “Spatula” • Smile, open your mouth slightly, place the wide front edge of your tongue on your lower lip. Hold it in this position for a count from 1 to 5-10. 4. “Bridge” • Smile, open your mouth, the tip of your tongue rests on your lower teeth. Curl your tongue, resting the tip of your tongue on your lower teeth. 5. “We build a bridge, we destroy a bridge” • Smile, open your mouth, the tip of your tongue rests on your lower teeth. Curl your tongue, resting the tip of your tongue on your lower teeth, then relax it. Perform these movements alternately. 6. “The breeze blows from the bridge” • Smile, open your mouth. Place your tongue in a “bridge” position, and then calmly and smoothly blow along the middle of your tongue. The air should be cold.

